Old family photos without dates and names can be frustrating but with these ideas, you could identify your ancestors in the pictures and maybe even break down a family history brick wall!
So pull out that shoebox under your bed full of old photos and read on for tips that will help you figure out when your ancestors lived. Then take that knowledge to the cemetery with the BillionGraves app and find their gravestone!
Identifying Our Ancestors in Old Family Photos
Looking into our ancestor’s eyes is a special feeling. We can often see a spark of ourselves in their image. We feel even more connected to them when we can recognize both their faces and their names.

We may wonder,
- “Do I have her nose?”
- “Did I inherit his hairline (or lack thereof!)?”
- “Where were they in this photograph?”
- “Why are they wearing that?”
- “What are they holding?”
- “What was the occasion that inspired them to have their picture taken on that very day?”
Old Family Photos in Fragile Albums
Each year, our Danish relatives gather in Michigan to hold a family reunion at Christmas time. One December, at the end of the celebration, a great-aunt placed two precious photo albums in my arms. Each album was about 2 inches thick. They contained old family photos of our ancestors that were taken before they crossed the ocean from Denmark to America.
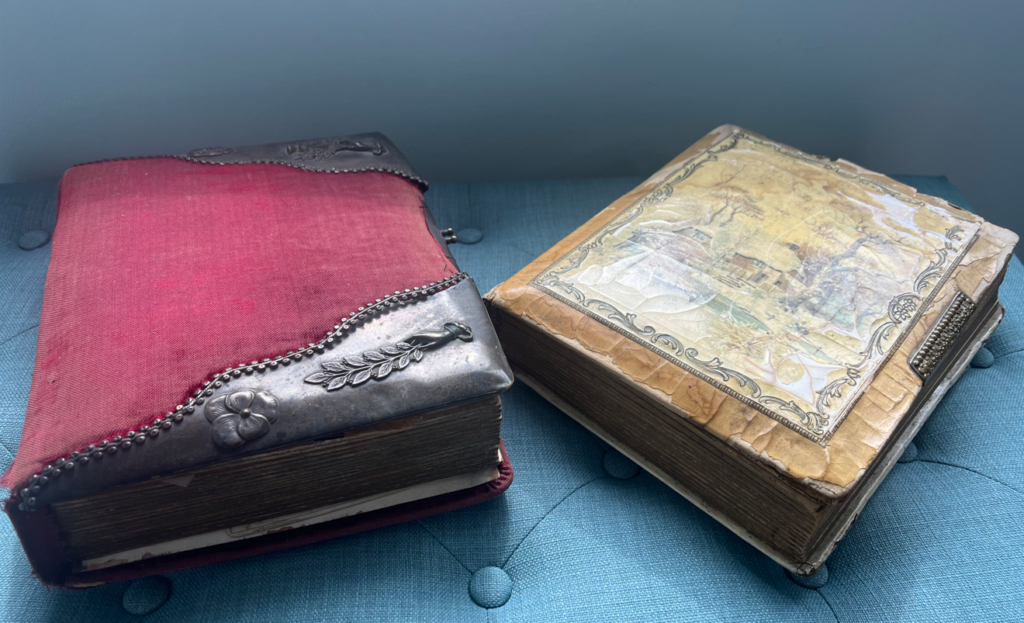
“Take these home with you,” she said.
Knowing that these albums made an appearance at each reunion, I promised to take good care of them and return them to her in good condition in time for the next get-together.
“Oh, no you don’t!”, she said. “You are the historian in our family now, so you keep them.”

I was in awe. There were pictures of men in military uniforms and women in traditional Danish bonnets. There were children with big round eyes trying to be brave for the loud camera flash.
But most of all, there were pages and pages of photographs with no names or dates on them. So sad.
What to do? I quizzed older family members and matched known images with the unknown as best I could but there were still many that were unidentified. I couldn’t bear to throw any of them away.
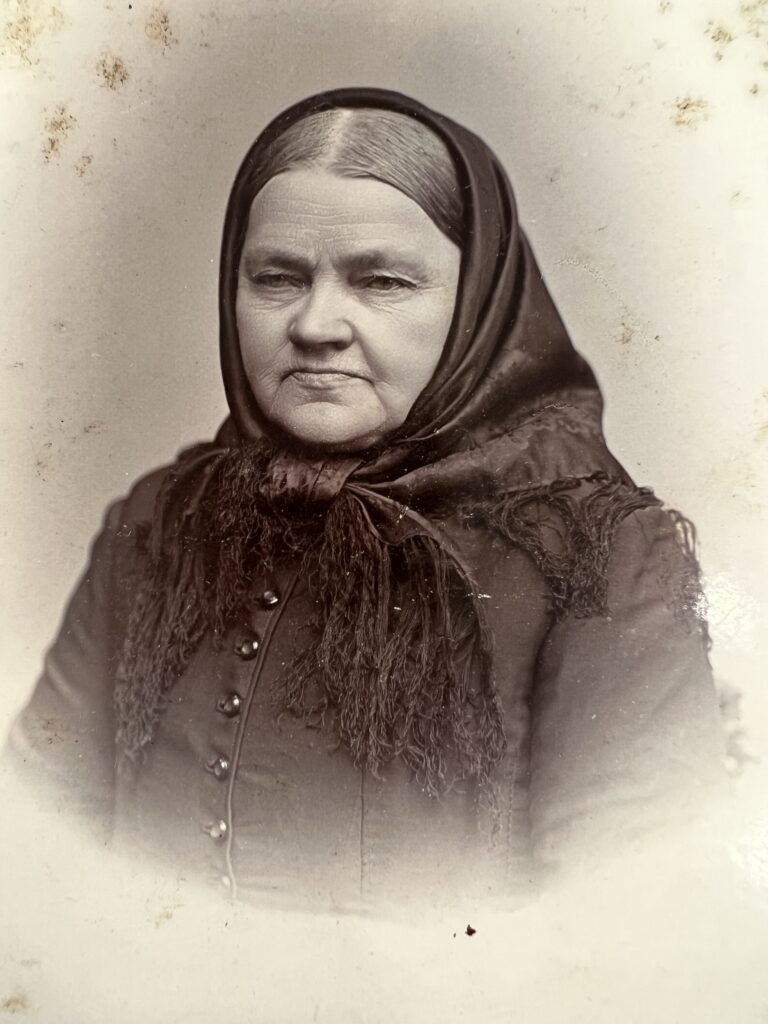
Fortunately, with some careful research, we were eventually able to identify many of the people and add names and dates to the old family photos. You can do it too!
Here are the steps you can take:
- First, figure out what type of photos you own.
- That will help you determine a range for when the pictures were taken.
- Use the photos to figure out location information.
- Look for their gravestone, which may provide their birth and death information.
- Finally, you may be able to then match the people in the photos with the people on your family tree. I’ll share my tips with you on how to do this, but first, a little photography history lesson . . .
Precious Old Family Photos
Can you imagine what it would be like to only have one photograph of your family? Or what if there was only one picture taken of you during your entire lifetime?

Before photography was invented, the only way you might have an image of your loved ones was to have a picture painted or drawn. Even after photography was invented, it was a complicated and often expensive process.
5 Types of Photos and Dates they were Used
There are 5 types of old family photos. The three most common types of old family photos in the 1800s were the daguerreotype, the tintype, and the ambrotype. These were followed by photos printed on paper called Carte de Viste and Cabinet Cards.
These are the time periods when each of these types of photographs was popular:
- Daguerreotype (c. 1839 – 1864)
- Ambrotype (c. 1854 – 1880s)
- Tintype (c. 1853 – 1930s)
- Carte de Viste (c. 1860 – 1890)
- Cabinet Cards (c. 1880s – 1890s)
Exposure Times

Look how long our ancestors had to sit still while a photo was being taken! (No wonder they weren’t smiling!)
- Early Daguerreotype: 10 – 30 minutes
- Late Daguerreotype: 20 seconds
- Ambrotype: – 5 – 60 seconds
- Tintype: 2 – 15 seconds
- Carte de Viste: 2 – 15 seconds
- Cabinet Cards: 2 – 15 seconds
How Much Did They Cost?
- Daguerreotype – $5 each (equivalent to about $175 today)
- Ambrotype – 25 cents each (equivalent to about $9 today)
- Tintype – .05 cents each (equivalent to about $2.00 today)
- Carte de Viste 25 cents each (equivalent to about $9 today) for 8 copies
- Cabinet Cards 25 cents each (equivalent to about $9 today) for 12 copies

Backing Materials
Each type of photo was developed directly onto a “support material”. These were the backing materials used:
- Daguerreotype – silver-plated copper
- Ambrotype – glass that was painted black on the back
- Tintype – lacquered or varnished sheet of iron (not tin as the name suggests)
- Carte de Viste – paper mounted on cardstock
- Cabinet Cards – cardstock mounted on compressed cardboard
Take a look at your own old family photos. Can you determine what type of “support material” they are mounted on? This can help you figure out when the photos were taken.

Display Cases
Here are the ways each type of photo was usually displayed.
- Daguerreotype – hinged cases behind glass
- Ambrotype – also in hinged cases behind glass
- Tintype – usually no display case; sometimes in a paper sleeve or thin folding case
- Carte de Viste – no case or in photo albums
- Cabinet Cards – no display case; freestanding in the family’s parlor curio cabinet
Do your family photos have display cases? If so, which type? This can help you determine the age of the photo.
History of Photography
A little history of photography will help us to understand what we are looking at when we try to tackle our own piles of vintage photos.
The First “Selfie”
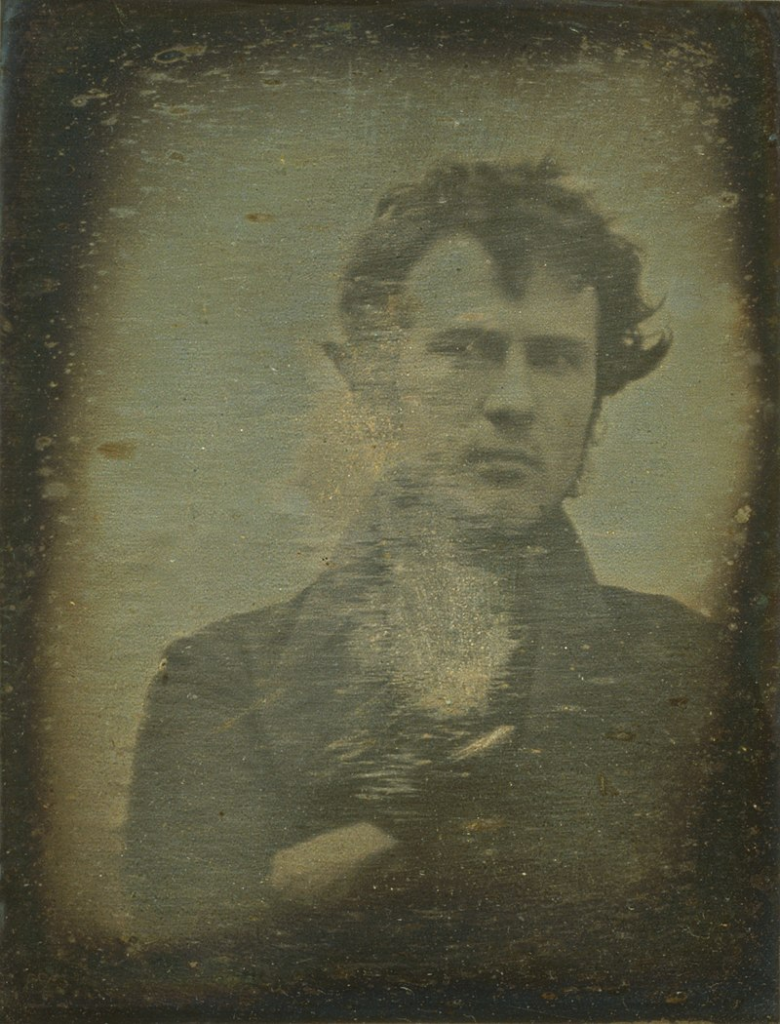
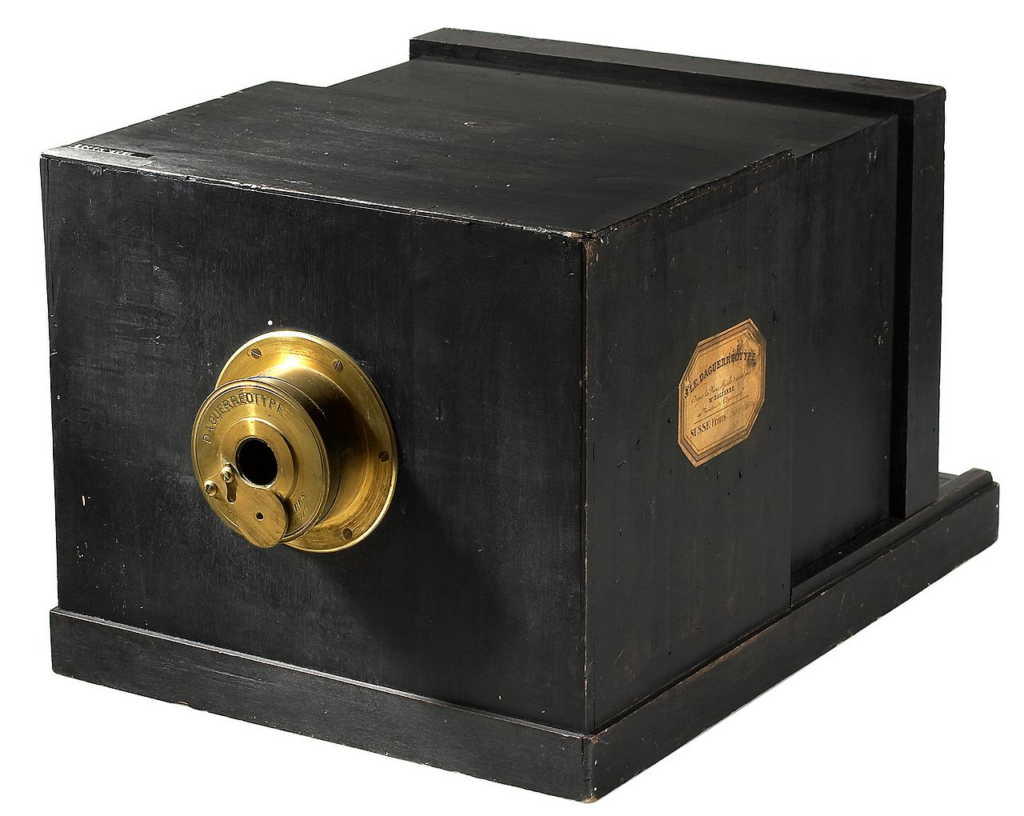
In 1839, a mathematician named Robert Cornelius took this photo. It was the first known “selfie” (even though the word “selfie” would not be used until more than 150 years later).
Cornelius used a device called a camera obscura to take the photograph at his family’s store in Philadelphia, Pennsylvania.

A camera obscura is a box, tent, or room with a small hole on one side. Light from the outside passes through the hole and projects an upside-down and reversed image onto the opposite wall.
Daguerreotype Photos
Although Robert Cornelius took the first “selfie” in 1839, it wasn’t until 1841 that he had it developed as a daguerreotype.
A daguerreotype was a one-of-a-kind image on a highly polished, silver-plated sheet of copper. The copper plate is heavy and about 0.4 mm thick, while the silver is about 0.01 mm.
The daguerreotype process was invented by Louis Daguerre in France and is named after him. In 1837, Daguerre discovered that by exposing iodized silver plates to light, a faint image could be developed using mercury fumes. The new technique not only produced a clearer image, but it also cut the exposure time down from several hours to about 10 or 20 minutes.
Cornelius had his portrait printed for an exhibition, but he did not consider it to be of value to the general public or something that could be mass-marketed. The back of the photo was labeled, “The first light picture ever taken”.
Photos of the Rich and Famous

Before long, photographers or “daguerreotypists” set up studios in major cities throughout the United States. They invited politicians and celebrities to have their portraits taken. Then the daguerreotypists hung those well-known, handsome, and beautiful faces on their walls, making their studios look like museums.
Next, they invited the public to visit their museum-like galleries, with the hope that they too would want to be photographed. By 1850, there were over 70 daguerreotype studios in New York City alone.
The daguerreotype above is the first known photograph of Abraham Lincoln. It was taken in 1846 when he was a US congressman-elect.

This is one of the oldest known photographic portraits in history. It was taken about 1840 by John William Draper of his sister, Dorothy Catherine Draper.
Daguerreotypes were expensive. They cost about $5 which was equal to a man’s average weekly wage. Due to slow shutter speeds, the people posing for the photos had to sit perfectly still for up to 20 minutes. Those two factors – money and time – meant that very few people had daguerreotype photos taken.
How to Identify a Daguerreotype
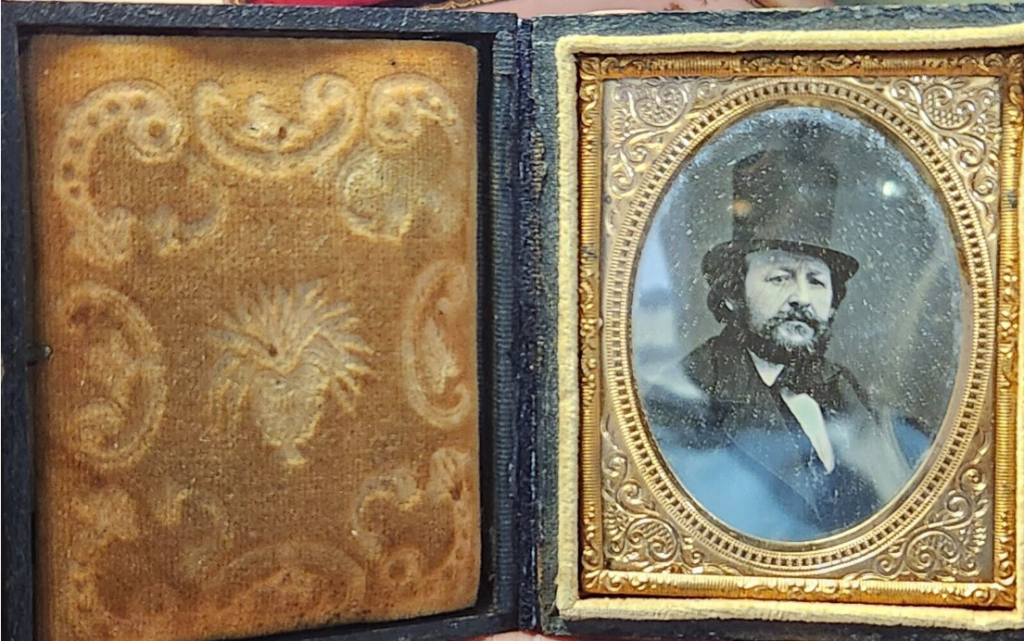
Here is how you can identify daguerreotypes:
- Daguerreotypes were printed on silver-plated copper.
- Images were backed by shiny silver.
- The image appears to be on a mirror, so when viewing it at an angle the dark areas are silver.
- Daguerreotypes are typically mounted in miniature hinged cases made of wood and covered with leather, paper, cloth, or mother of pearl.
- The photos are sometimes protected by a sheet of glass in the case.
Ambrotype Photos
Ambrotypes were most popular in the mid-1850s to mid-1860s.
Ambrotypes were produced by creating a negative on ruby-colored glass or clear glass.
If you hold an ambrotype up to sunlight or lamplight, you will be able to see the negative image.
After the ambrotype photo was developed, it had to be placed on dark background in order for the positive image to be seen. The dark background could be a piece of black paper, or black fabric, or it could be painted black on the backside.

With the cost of daguerrotypes at $5, very few could afford them. But ambrotypes were another story. They were only 25 cents!
Families that previously only had 1 or 2 photos taken during their entire lifetimes now began taking photos for all kinds of events – family reunions, weddings, new babies, graduations, funerals, and more.
Traveling Ambrotype Photographers

Ambrotypes became even more popular for family photos as traveling photographers took to the road. The traveling photographers needed strong backs to carry their portable darkrooms.
A blanket over their heads allowed photographers to block out glare from the sun. (They were printing their images on glass so it would be similar to you trying to see your phone screen when you are outdoors on a bright sunny day.)
The darkroom beneath the blanket had storage spaces for chemicals, sheets of glass, and photo cases.
Examples of Ambrotype Photos

This ambrotype, taken about 1864, is of a Union soldier – Sergeant Samuel Smith with his wife and children. It is the only known photograph of an African-American Union soldier with his family.
Like daguerrotypes, ambrotypes were fragile so they were also usually kept in folding cases but this photo has been framed for display.

How to Identify an Ambrotype
- Ambrotypes were printed on a piece of glass with the back painted black.
- Alternatively, there may be a piece of black paper or black fabric behind the glass.
- The dark areas of an ambrotype remain dark even when viewed at an angle.
- When held up to the light, an ambrotype will look like a negative image.
- Glass is a very chemically stable support material so the image will usually be sharp.
- The glass may be broken or cracked. This can be caused by extreme shifts in temperature when old family photos are stored in a hot attic or chilly basement.
- Prolonged exposure to high humidity may result in a hazy appearance.
Tintype Photos
Even though the name “tintype” makes it seem like the photos are printed on tin, they are not. They are actually printed on thin sheets of iron.

Tintypes were cheap and easy to make so they quickly became popular with US Civil War soldiers who sent them home to their families.
The oval line on this photo lets you know that this tintype used to be in a display case.

Tintype booths were popular at county fairs and carnivals.
Can’t you just hear the man in the top hat in this photo shouting to the crowd through his megaphone, “Step right up and ‘make‘ your picture taken,” as it says on the sign?!

Since film processing used highly toxic and often dangerous chemicals, photographs were taken almost exclusively by professionals until the twentieth century.
Most permanent photography studios were located in major cities, but some photographers hauled their equipment outside city limits in horse-drawn wagons. They went door-to-door and took photos of families, usually on their front porch where the natural lighting was best.

In towns, photographers set up tents during summer festivals and crowds flocked to them.
Check out these prices – 2 large photos for just 10 cents! And the pictures are ready in just 2 minutes! What a deal!
The sign claims they will deliver “photos that ‘looks‘ like you”! (I should hope so!)

At first, tintypes were presented in folding cases, surrounded by narrow gilt frames, just like daguerreotypes and ambrotypes. But by the 1860s this elaborate presentation was abandoned, and the metal sheets were either freestanding or inserted in paper sleeves with a cutout window. The thin sheets of metal were also sometimes placed in photo albums.

Another change in the 1860s was that formal poses and serious faces, as seen in daguerreotypes and ambrotypes, went by the wayside.
Since tintypes were cheap and easy to produce, people were often informal and sometimes downright hilarious. (Wouldn’t you just love to know which of your ancestors passed down the DNA to pose like this? There’s one in every family!)

How to Identify a Tintype
Here is how you can identify a tintype photo:
- The image is printed on a sheet of iron so a magnet will stick to it!
- Look for rust, blistering, and corrosion. Humid environments can cause the iron to rust, which causes the lacquer and overlying emulsion to bubble and flake.
- Tintypes may be bent or scratched since the sheet of iron is very thin (~0.15 mm).
- Many tintypes have the four corners of the metal trimmed off to prevent the sharp corners from cutting fingers and pockets.
Old Family Photos Printed on Paper
By the 1870s, photographs printed on glass or metal were replaced by photographs printed on paper since it was less expensive and easier to use.

Photos printed on paper were often sepia-toned (shades of brown), which made the image last longer than black and white photos.
Carte de Viste Photos
Carte de Viste (abbreviated CdV), patented in Paris, were photographs that were printed on paper and mounted on thick cardstock. They were popular from 1860 to 1890.
Carte de Viste is French for “visiting card”. The photos were small, just 2 3/8” by 4”, and they were used as calling cards – similar to the way we might use printed business cards today.

Carte de Viste photos were game-changers because they had negatives and could be reprinted as multiple copies. Previous types of photos only had one copy.
In the 1860s, Carte de Viste pictures were traded among friends. Then the cards were displayed in albums in Victorian parlors to entertain visitors. So if you really can’t figure out how some of the people in your old photos are related to your family, they just might be their neighbors or friends.

The albums held not only Carte de Viste from their dear friends and family members but also of famous celebrities and well-known public figures.
The Carte de Viste sometimes had the name of the person in the photo printed at the bottom. This is the calling card for Sojourner Truth who was born into slavery, escaped with her infant daughter, and became an abolitionist.
Cabinet Cards
By the 1880s, Carte de Visite photos were replaced by Cabinet Cards. They remained popular through 1900.

Cabinet Cards were larger (41⁄4 x 61⁄2 inches) than Carte de Visite and they often had the name and location of the photography studio at the bottom or on the back.
This information was printed on the cards as advertisements for the photographer but it also makes them genealogical treasures for us!

Check for Photographer’s Names and Locations
If you have old family photos or Cabinet Cards with the name and location of the photographer on them, try some of these methods to find out when the photographer was in business:
- Google the photographer’s name and location for general information.
- Search city directories to find the range of years that the photographer was working in that location.
- Go to Langdon’s List of 19th and 20th Century Photographers, an online resource for American photographers from 1844 to 1950.
- Search newspapers with classified ads for the photographer.
- Check land deeds and census records in the photographer’s location.
Sit Still!
Early cameras had very slow shutter speeds, meaning that the shutter needed to remain open for a longer period of time to expose the chemicals on the plate to light.
So our ancestors had to hold very still while the photograph was being taken for the image to come out crisp and not be blurred by their movement.

The earliest daguerreotype images required an exposure time of about twenty minutes. The long exposure times made it nearly impossible to take portraits because no one could sit still long enough.
By the mid-1800s, exposure times had been reduced to about twenty seconds.

The need to sit very still is why people sometimes look sad or uncomfortable in old photographs.
No smiling allowed! No blinking! This was serious business!
Just try sitting as still as a statue with a grin on your face for up to 20 minutes!
And then try to do it with an entire family! Sometimes squirming children were put into restraints for the photo shoot. If they wiggled, even just a little, the photo would be a blurry mess.

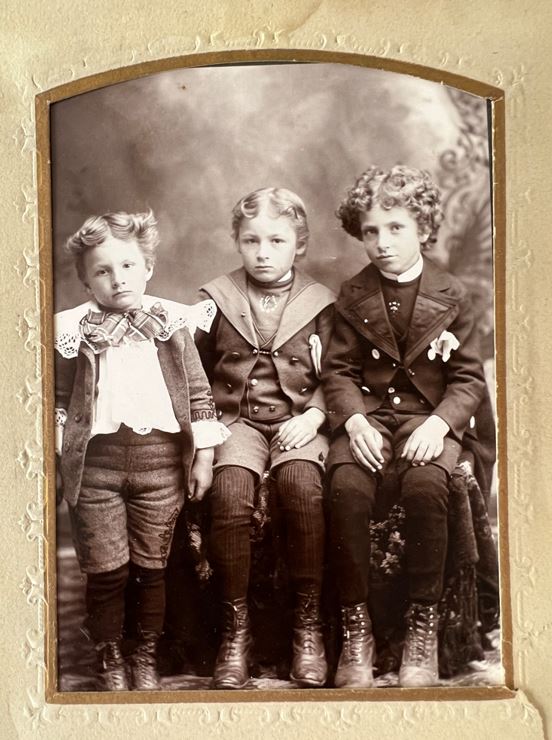
Old family photos taken in the 1800s may include props such as wooden pillars, umbrellas, chairs, stools, or tables. People could lean on them for balance so they could hold still longer. This photo was taken in 1870. (Aren’t they lovely!?)
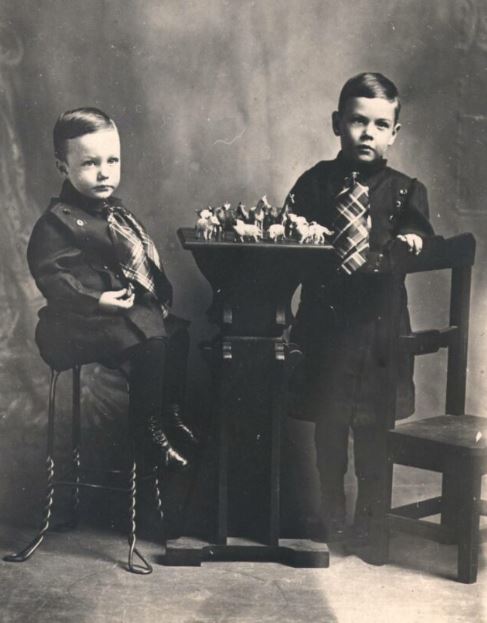
Props were especially helpful when photographing children. (Psst . . . the boy on the left was my grandpa! He says he couldn’t go to sleep at night without one of those little animals in his hand.)

In the late-1800s, photographers sometimes used adjustable cast iron stands for the models to rest their arms.
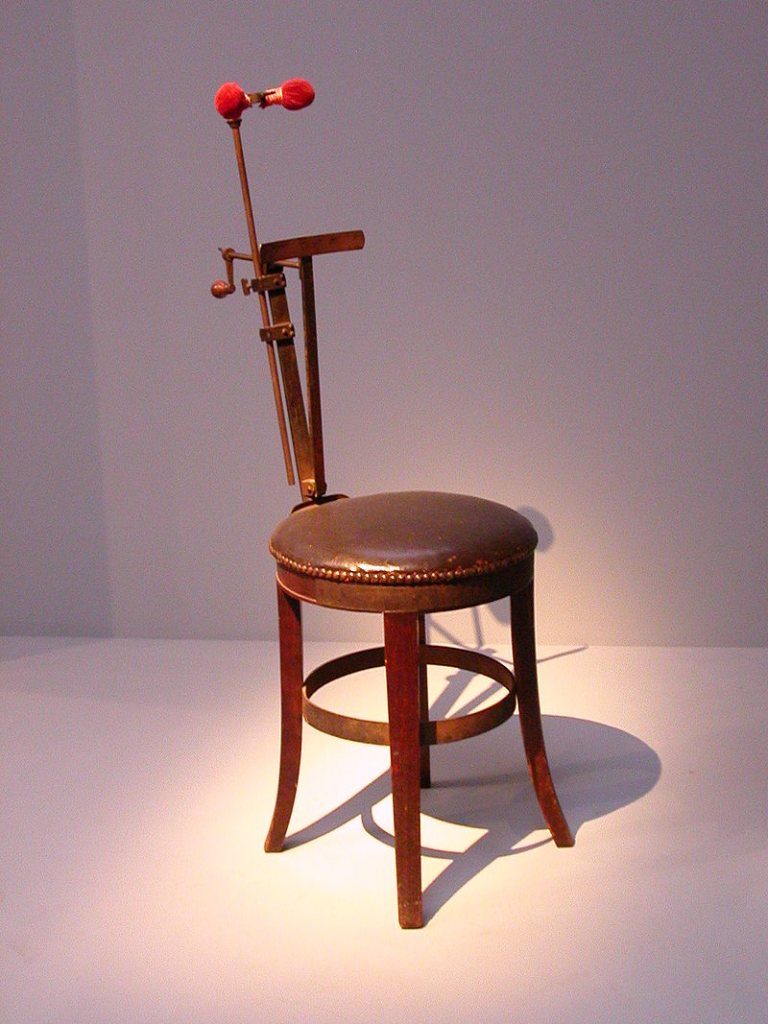
If the people in your old family photos look especially stiff, they may have been sitting in a restraining chair.
Trick Photos
Throughout the 1800s, photographers were constantly developing (no pun intended 😉 new ways to attract customers. One method they used was to take trick photos.

This trick photo, taken in 1893, makes it appear as if the photographer is taking a picture of himself. Notice the head brace used to help the person being photographed to hold still.
Sometimes restraining chairs were used to support bodies for post-mortem photos (taken after the person died), but most of the time they were used to keep the subject from moving during the long exposure times.

This photo was taken by my own great-grandfather, Willis Cheney, a thriving photographer from 1891-1904.
Wait, are we seeing triple?! Yes! Willis was not only the photographer, he was also the subject of the photo . . . in three different poses.
If you have a trick photo in your family collection, it was probably taken around 1890 to 1910.
Hand Tinting
Up until 1900, all photographs were black-and-white or sepia-toned but sometimes portions of the photo were hand-painted to add a little color.

This old family photo, taken in 1860, is of a Peninsular war Veteran and his wife. A bit of hand-tinted color has been added to the fabric.
Buttons and jewelry were sometimes painted gold.

During the US Civil War era, cheeks were often painted pink and fabric was given a wash of blue in old family photos like this one.

The more wealthy the family, the more color may have been added to the photo. This is the grandson of Vice-Admiral Napier in Sydney, Australia in 1860.
Identifying the People in the Photos
Understanding a little about the history of photography will help you discover more information about those mysterious family portraits.
So grab one of your old family photos and let’s do this! Take the following steps.
1) Figure out what kind of photo you have:
- Daguerreotype (c. 1839 – 1864)
- Ambrotype (c. 1854 – 1880s)
- Tintype (c. 1853 – 1930s)
- Carte de Viste (c. 1860 – 1890)
- Cabinet Cards (c. 1880s – 1890s)
2) Narrow down the time range based on the dates these types of photos were popular.
3) If the photographer’s name or location is on the photo, figure out when the business was operating.
4) Look for internal clues. If the photo is of a married couple, look for people in your family tree that had weddings during the estimated time range. If the photo is of a family, compare the number of children they had during the estimated time range.
By the time you figure this out, your previously-unknown ancestors will feel like your best friends!
Keep your eye out for future BillionGraves blog posts that will help you to use clothing fashions, hairstyles, furniture, cars, and other clues to narrow down your “guesstimates”!
MyHeritage New PhotoDater
One of BillionGraves’ partners, MyHeritage, has just announced the release of PhotoDater™, a groundbreaking, free new feature that estimates the year a photo was taken using AI technology.

PhotoDater™ AI is trained to recognize nuances such as clothing, hairstyles, facial hair, furniture, cars, and other objects that are characteristic of a particular decade. It then calculates the estimated year the photo was taken, together with a confidence level and average error range.
You can read all about PhotoDater™ by clicking HERE.
Now, Find Their Headstone!
Once you have identified the people in your family photos, try to find their headstones. The information and symbols on their gravestones may give you even more clues about their life, occupation, and religion. They may even help you find other family members buried nearby.

Would you believe you could go from sitting in your living room to standing in front of a particular gravestone in your local cemetery in less than 15 minutes? It’s true!
Here’s how in 10 easy steps:
- Download the BillionGraves app. Set up an account.
- From the main screen of the app, tap on “find headstones”.
- Enter a name.
- Choose one of the search results.
- Tap on “directions”.
- Drive to the cemetery.
- As you arrive at the cemetery, the BillionGraves app will show the location gravestone you looked up on the map. It will be marked with a GPS pin.
- The BillionGraves app will also display a flashing blue dot on the screen. The blue dot represents the GPS location of the phone in your hand. The blue dot will move as you walk toward the marked gravestone.
- When the blue dot and the GPS marker on the gravestone are aligned, you will be standing within a few feet of the gravestone.
- Celebrate!!
For more details on how to find a headstone in a cemetery, click HERE.
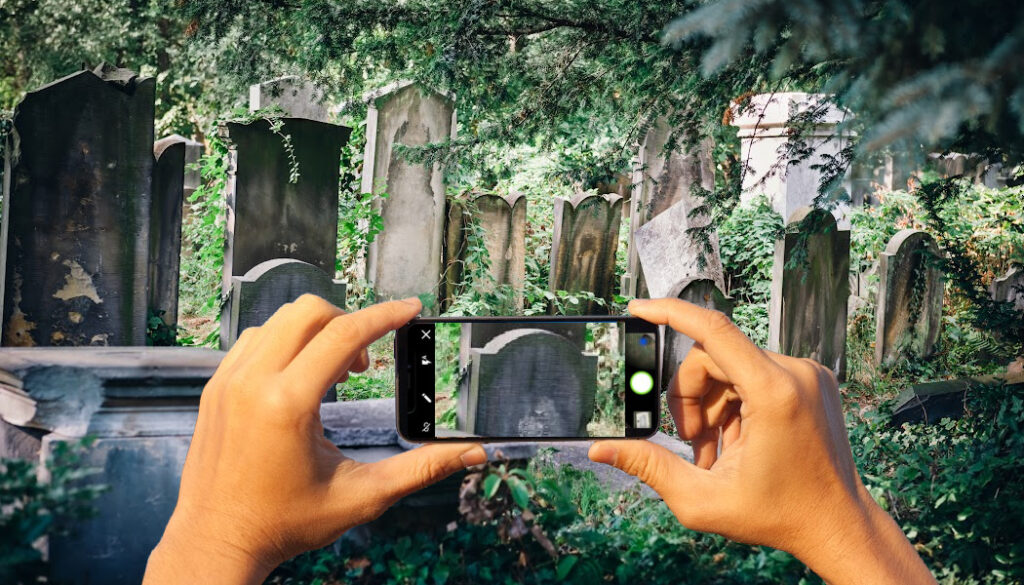
Take Gravestone Photos to Help Others Find Their Ancestors
Taking photos of gravestones with the BillionGraves app on your smartphone is easy! Click HERE to get started.
You are welcome to do this at your own convenience, no permission from us is needed. If you still have questions after you have clicked on the link to get started, you can email us at Volunteer@BillionGraves.com. We’ll be happy to help you!
Are you planning a group service project? Email us at Volunteer@BillionGraves.com for more resources. We will help you find a cemetery that still needs to have photos taken.
Happy Cemetery Hopping!
Cathy Wallace

